
In this article we will look at Installing Oracle 12C database on Solaris x86 64bit version. This article assumes that you already had Solaris 10 installed on Virtualbox.
Preparing System for Installation
The first step toward Oracle installation is to perform the pre-installation tasks.
Configuring hosts file
The first step is to properly name your host machine. The hostname should properly be provided with IP address for installation to continue. Ideally, your /etc/hosts file should look something like this.
192.168.34.47 sol10.cm
127.0.0.1 localhost
Kernel Parameters
The default installation of Solaris 10 is normally good enough for oracle database installation. You just have to configure one parameter. Use the command below to set the required kernel parameters. Remember that you will have to use the root login to run the commands.
# projadd -K "project.max-shm-memory=(privileged,4G,deny)" user.oracle
To confirm that parameter has been changed you can view the contents of /etc/project file.
# cat /etc/project

Setting UDP and TCP Kernel Parameters.
# /usr/sbin/ndd -set /dev/tcp tcp_smallest_anon_port 9000
# /usr/sbin/ndd -set /dev/tcp tcp_largest_anon_port 65500
# /usr/sbin/ndd -set /dev/udp udp_smallest_anon_port 9000
# /usr/sbin/ndd -set /dev/udp udp_largest_anon_port 65500
Required Packages
You can check if packages required for Oracle are installed or not using the following command.

# pkg install SUNWhea
Note Swap size minimum 3G!!
Make sure your swap size is atleast 3G if not increase the swap size with the commands below
# mkfile 1024m /export/home/oracle/oracle_swap
# swap -a /export/home/oracle/oracle_swap
Creating Oracle user, groups and directories
The last step is to create oracle user groups and directories and set appropriate permissions and environment.
# groupadd oper
# groupadd dba
# groupadd oinstall
# useradd -g oinstall -G dba,oper -d /export/home/oracle -s /usr/bin/bash oracle
# passwd oracle
# mkdir -p mkdir /export/home/oracle
# mkdir -p /u01/app/oracle/product/12.0.1/db_1
# chown -R oracle:oinstall /u01 /export/home/oracle
# chmod -R 775 /u01
Finally, add the following lines at the end of .profile file in Oracle user home directory.
# su – oracle
# vi .profile
# Oracle Settings
TMP=/tmp; export TMP
TMPDIR=$TMP; export TMPDIR
ORACLE_HOSTNAME=sol10.cm; export ORACLE_HOSTNAME
ORACLE_UNQNAME=CDB12C; export ORACLE_UNQNAME
ORACLE_BASE=/u01/app/oracle; export ORACLE_BASE
ORACLE_HOME=$ORACLE_BASE/product/12.0.1/db_1; export ORACLE_HOME
ORACLE_SID=CDB12C; export ORACLE_SID
PATH=$ORACLE_HOME/bin:$PATH; export PATH
DISPLAY=:0.0; export DISPLAY
Installing Oracle 12C
You are now ready to install Oracle 12C database on your system. Log in as Oracle user, create an installation directory under /export/home/oracle and copy the installation files to that directory.
$ mkdir -p /export/home/oracle/inst
Extract both files uzing unzip utility, and start the installation
$ unzip solaris.x64_12102_database_1of2.zip
$ unzip solaris.x64_12102_database_2of2.zip
$ cd database
$ ./runInstaller
Checking Temp space: must be greater than 180 MB. Actual 4369 MB Passed
Checking swap space: must be greater than 150 MB. Actual 4751 MB Passed
Checking monitor: must be configured to display at least 256 colors. Actual 16777216 Passed
Preparing to launch Oracle Universal Installer from OraInstall2019-09-12_03-41-17PM. Please wait ...
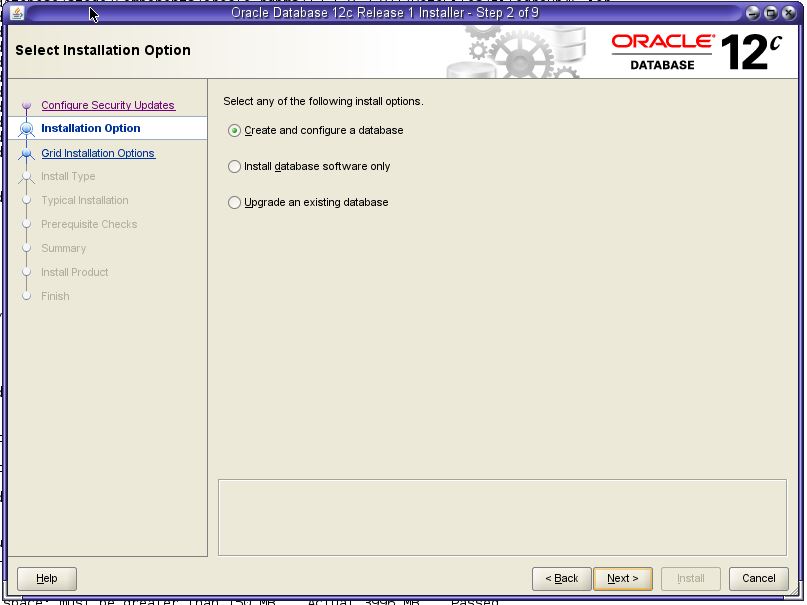
The installer will start and you will see the screen like below.


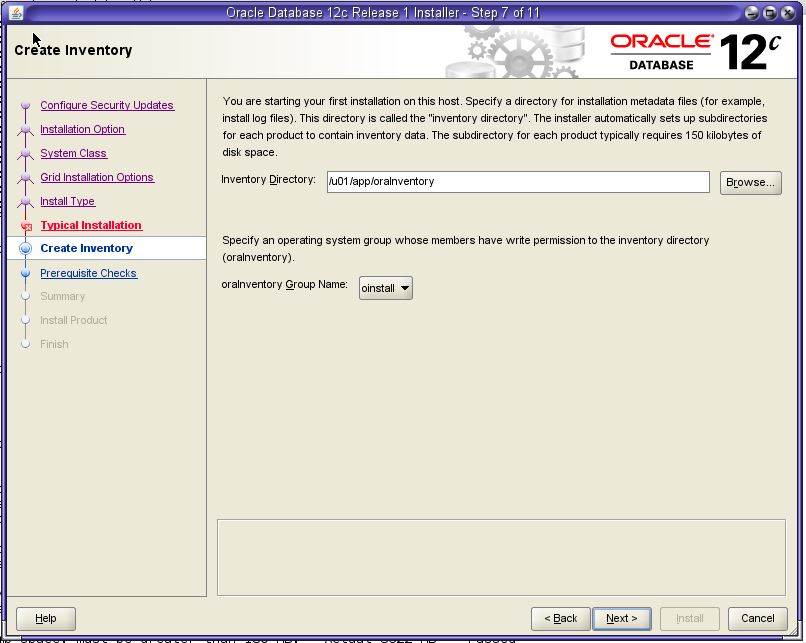


Once the installation is complete, you will be asked the run the scripts as root.
# /u01/app/oraInventory/orainstRoot.sh
Changing permissions of /u01/app/oraInventory.
Adding read, write permissions for group.
Removing read, write, execute permissions for world.
Changing groupname of /u01/app/oraInventory to oinstall.
The execution of the script is complete.
# /u01/app/oracle/product/12.0.1/db_1/root.sh
Performing root user operation for Oracle 12c
The following environment variables are set as:
ORACLE_OWNER= oracle
ORACLE_HOME= /u01/app/oracle/product/12.0.1/db_1
Enter the full pathname of the local bin directory: [/usr/local/bin]:
Creating /usr/local/bin directory...
Copying dbhome to /usr/local/bin ...
Copying oraenv to /usr/local/bin ...
Copying coraenv to /usr/local/bin ...
Creating /var/opt/oracle/oratab file...
Entries will be added to the /var/opt/oracle/oratab file as needed by
Database Configuration Assistant when a database is created
Finished running generic part of root script.
Now product-specific root actions will be performed.
Once you are done with that go back on Installer screen and click OK.

The installation will continue with configuration.

Once database has been created, you will be asked to do some password management. You can always do this later. Click OK to finish the installation.

Click Close to exit the Installer.
Oracle 12c Database Installation On Solaris is successful.
Post Installation
You now log into your database to confirm if database has been created and configured.
-bash-3.2$ sqlplus / as sysdba
SQL*Plus: Release 12.1.0.2.0 Production on Thu Sep 12 16:51:59 2019
Copyright (c) 1982, 2014, Oracle. All rights reserved.
Connected to:
Oracle Database 12c Enterprise Edition Release 12.1.0.2.0 - 64bit Production
With the Partitioning, OLAP, Advanced Analytics and Real Application Testing options
SQL> select instance_name from v$instance;
INSTANCE_NAME
----------------
CDB12C
You can check which PDBs are configured and also you can log into PDB from within CDB as well.
SQL> select name, open_mode from v$pdbs;
NAME OPEN_MODE
------------------------------ ----------
PDB$SEED READ ONLY
PDB1 READ WRITE
SQL> alter session set container=PDB1;
Session altered.
SQL> select file_name from dba_data_files;
FILE_NAME
--------------------------------------------------------------------------------
/u01/app/oracle/oradata/CDB12C/PDB1/example01.dbf
/u01/app/oracle/oradata/CDB12C/PDB1/SAMPLE_SCHEMA_users01.dbf
/u01/app/oracle/oradata/CDB12C/PDB1/sysaux01.dbf
/u01/app/oracle/oradata/CDB12C/PDB1/system01.dbf
Good my friend
ReplyDeleteThanks!!
DeleteIt's really a great and helpful piece of info. I'm glad that you just shared this useful information with us. Please keep us up to date like this. Thank you for sharing.Here is the right place to Submit Guest Post Big Data.
ReplyDelete